
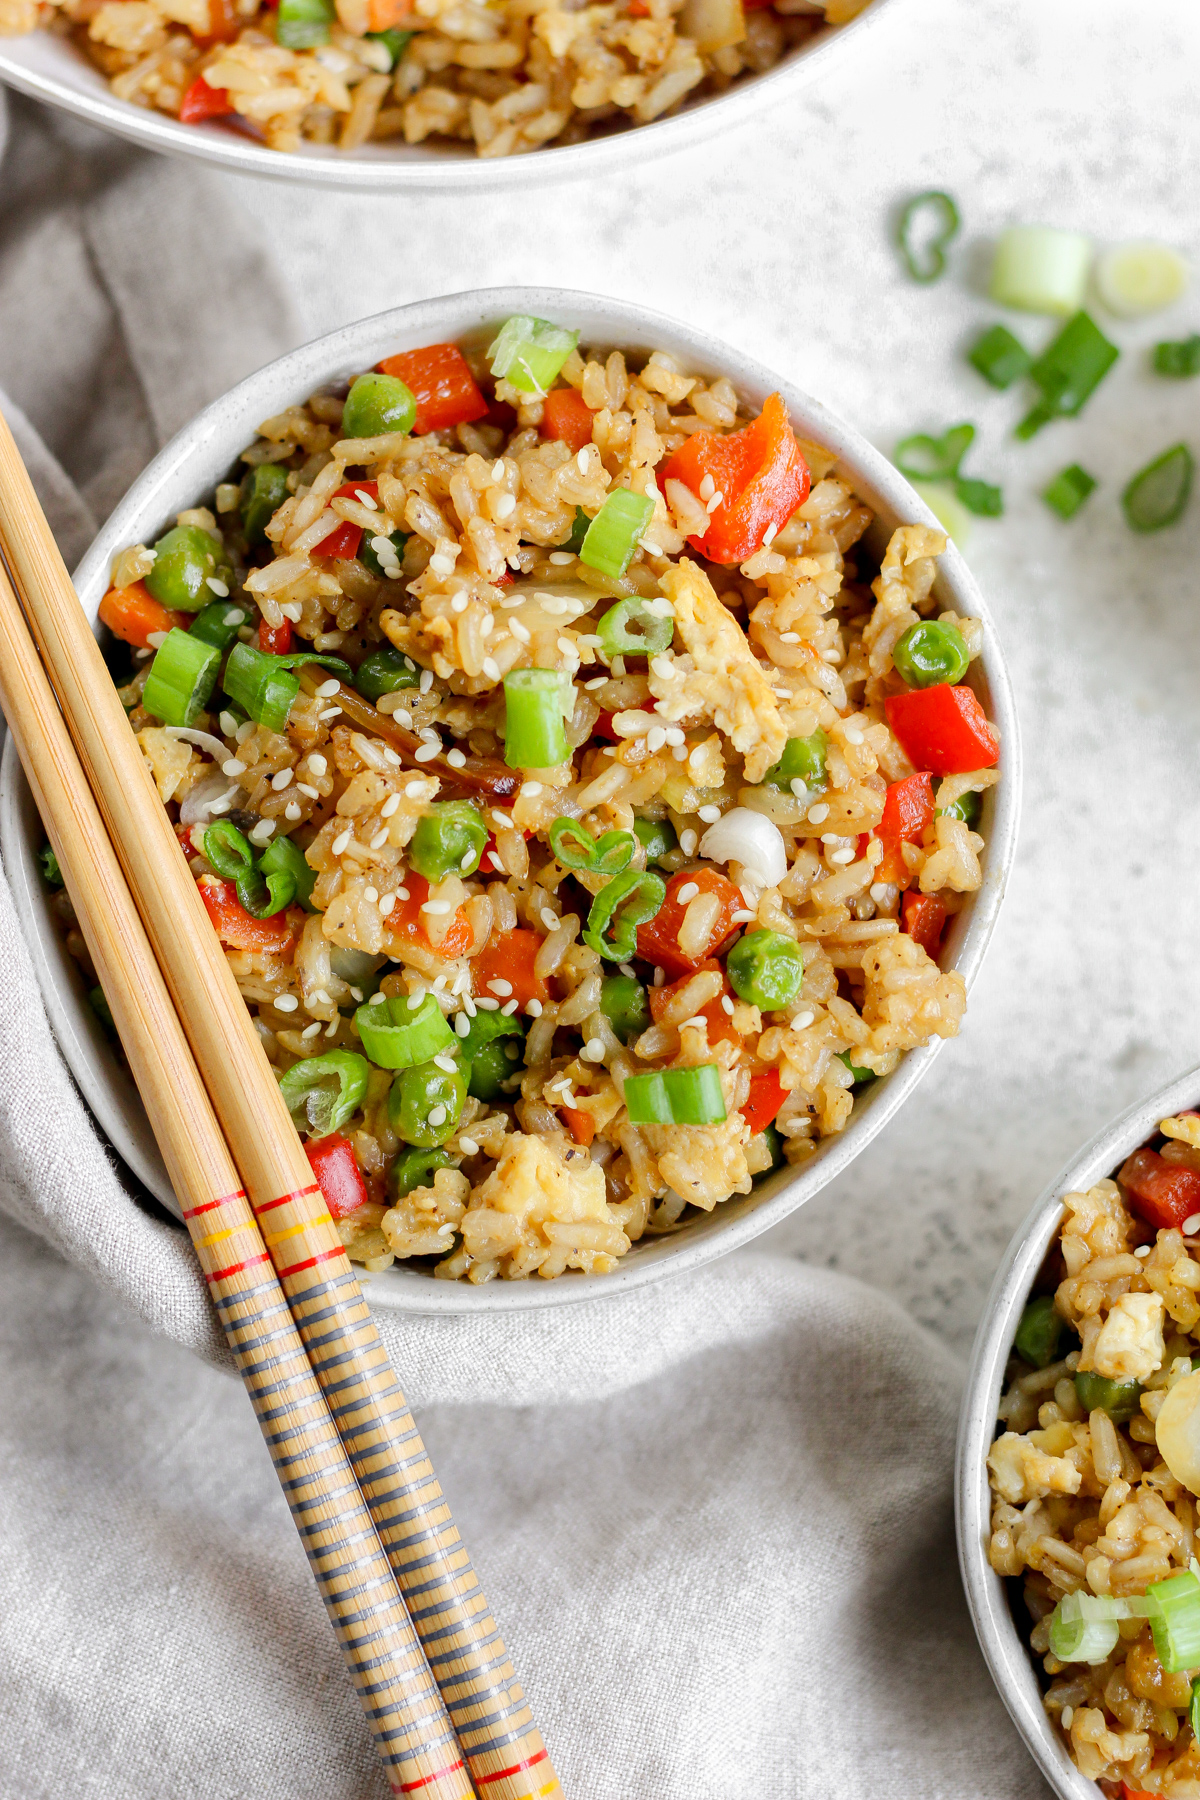
This easy gluten free fried rice has all the cozy takeout vibes you crave, but it's made with simple, wholesome ingredients right at home.
Jump to:
Ever since my first Whole30 back in 2017, when I learned about cooking with real ingredients, fried rice has been one of those meals I always find myself craving but rarely trust when it comes from a restaurant. Between soy sauce, mystery oils, and cross contamination, it just never feels worth the risk. That's why I started making this gluten free fried rice at home using coconut aminos, fluffy rice, and colorful veggies. It gives you that classic savory, cozy fried rice flavor without the gluten or the heaviness, and it's one of those easy recipes I love pairing with things like my sweet and sour chicken or teriyaki salmon for the perfect weeknight dinner.
What makes this recipe unique?
Most fried rice recipes rely on traditional soy sauce and heavy oils, which not only contain gluten but also leave the rice feeling greasy and weighed down. This version uses coconut aminos instead, which gives you that savory, umami flavor without the wheat or excess salt. I also use day-old rice when possible, which creates that slightly crispy, restaurant-style texture that makes fried rice so irresistible. Plus, this recipe is super flexible, so you can easily add your favorite veggies or protein and make it your own while still keeping it light, cozy, and wholesome.
Ingredients

Is fried rice usually gluten free?
No, traditional fried rice is not gluten free because it's almost always made with regular soy sauce, which contains wheat. It's also commonly cooked on shared surfaces in restaurants, which can lead to cross-contamination.
What kind of rice is best for gluten free fried rice?
Long grain rice, like jasmine, basmati, or white rice works best because it stays fluffy and doesn't clump together. Day old rice is ideal since it dries out slightly in the fridge and fries up beautifully without getting mushy.
Can I use fresh rice instead of leftover rice?
Yes, but fresh rice holds more moisture, which can make fried rice softer. If you're using freshly cooked rice, spread it out on a baking sheet and let it cool for 10 to 15 minutes before adding it to the pan to help it dry out.
Substitutions and swaps
Rice: Any long-grain rice works beautifully in this recipe. I love using brown rice for a little extra heartiness, but white rice, jasmine rice, or basmati rice all work great too. If you want a lighter option, you can even use cauliflower rice. For the best texture, day-old or chilled rice fries up better than freshly cooked rice.
Coconut aminos: If you don't have coconut aminos on hand, you can swap in tamari or gluten free soy sauce. Both give you that classic savory fried rice flavor while keeping the recipe gluten free.
Peas and carrots: Frozen peas and carrots make this recipe quick and easy, but fresh peas, diced carrots, or even snow peas work just as well. This is also a great way to use up any leftover veggies hanging out in your fridge.
Bell peppers: Red bell pepper is my go-to for a little sweetness and color, but green, yellow, or orange bell peppers all work perfectly in this recipe.
Ginger: If you don't have ground ginger, fresh grated ginger is a great swap and adds even more bright, fresh flavor.
Step by Step

- Step 1: Heat a large skillet or wok over medium heat and add a tablespoon of oil. Once hot, add the diced onions and cook for 2 to 3 minutes until softened. Then add the minced garlic and cook for about 30 seconds to 1 minute, just until fragrant.

- Step 2: Stir in the peas, carrots, and bell peppers and cook for about 5 minutes, until the veggies are tender.

- Step 3: Add cooked or day old rice rice to the pan and gently stir everything together.

- Step 4: In a small bowl, whisk together the coconut aminos, sesame oil, rice vinegar, salt, pepper, and ginger. Pour the sauce over the rice and toss until everything is evenly coated.

- Step 5: Push the rice to the edges of the pan, creating a well in the center. Pour the beaten eggs into the middle and let them sit for 1 to 2 minutes, then gently scramble them in the center of the pan.

- Step 6: Once the eggs are cooked, stir them into the rice until fully combined.
Kaleena's Tips
- Use cold or day old rice whenever possible for the best texture.
Make sure your pan is hot before adding the rice so it lightly fries instead of steaming. - Add the sauce after the rice and veggies are already warm so it coats everything evenly.
- Do not overcrowd the pan or the rice will turn mushy instead of lightly crispy.
- Use a wide skillet or wok so everything has space to cook evenly.
Taste at the end and adjust the salt or coconut aminos to your preference.
Storing and reheating
Storing: Let the fried rice cool completely, then store it in an airtight container in the refrigerator for up to 4 days.
Reheating: To reheat, add the leftover rice to a skillet with a little oil and warm over medium heat, stirring occasionally until heated through. You can also microwave it in a covered dish in 30-second intervals, stirring between each, until hot.

If you make this recipe, I'd love to hear what you think! Leave a star rating or drop a comment below. Your feedback means so much to me! And if you snap a photo, tag me on Instagram at @kaleenas.kitchen so I can see your version!
Recipe

Easy Gluten Free Fried Rice (Better Than Takeout)
EQUIPMENT NEEDED
- 1 Wok or large skillet
- 2 Small bowls
Ingredients
- 3 cups cooked rice
- ¼ cup coconut aminos
- 1 cup chopped onion
- 1 cup frozen peas and carrots
- 1 bell pepper (chopped)
- 2 eggs
- 3 cloves garlic (minced)
- 1 tablespoon rice vinegar
- 1 tablespoon avocado oil
- 1 teaspoon sesame oil
- 1 teaspoon dried ginger
- ½ teaspoon salt
- ½ teaspoon pepper
- Green onion optional for garnish
- Sesame seeds optional for garnish
Instructions
- Cook your rice according to the package instructions, then set it aside to cool. Cold or day-old rice works best for fried rice.
- Heat a large skillet or wok over medium heat and add a tablespoon of oil. Once hot, add the diced onions and cook for 2 to 3 minutes until softened.
- Add the minced garlic and cook for about 30 seconds to 1 minute, just until fragrant.
- Stir in the peas, carrots, and bell peppers and cook for about 5 minutes, until the veggies are tender.
- Add the cooked rice to the pan and gently stir everything together.
- In a small bowl, whisk together the coconut aminos, sesame oil, rice vinegar, salt, pepper, and ginger. Pour the sauce over the rice and toss until everything is evenly coated.
- In a small bowl wisk together the eggs. Push the rice to the edges of the pan, creating a well in the center. Pour the beaten eggs into the middle and let them sit for 1 to 2 minutes, then gently scramble them in the center of the pan.
- Once the eggs are cooked, stir them into the rice until fully combined.
- Serve warm and top with green onions, sesame seeds, red pepper flakes, or sriracha if you like a little extra kick.
Notes
- Use cold or day old rice whenever possible for the best texture.
Make sure your pan is hot before adding the rice so it lightly fries instead of steaming. - Add the sauce after the rice and veggies are already warm so it coats everything evenly.
- Do not overcrowd the pan or the rice will turn mushy instead of lightly crispy.
- Use a wide skillet or wok so everything has space to cook evenly.
Taste at the end and adjust the salt or coconut aminos to your preference.
Nutrition
*nutrition information is an approximate
Share this recipe on Facebook
Hi, I'm Kaleena!
Here you'll find wholesome comfort food made with real ingredients and big flavor. I share easy, approachable recipes designed for everyday life, from 30-minute dinners and simple side dishes to cozy soups and crowd-pleasing favorites.
Many of my recipes are naturally gluten free or easily adapted with simple swaps, but the focus is always on real food that tastes amazing and feels doable. Whether you're cooking for a busy weeknight or a relaxed weekend at home, my goal is to help you feel confident in the kitchen and enjoy cooking meals you're excited to make.


Leave a Comment