
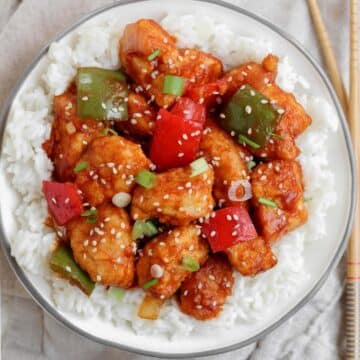
Crispy chicken, a sticky sweet sauce, and crunchy peppers and onions, this sweet and sour chicken comes together in one skillet in about 35 minutes. It's the kind of weeknight dinner that tastes like your favorite takeout order, minus the wait.

Jump to:
Recipe at a glance
- 📋 Recipe name: Crispy Gluten Free Sweet and Sour Chicken
- 👥 Servings: 4
- ⏲️ Total time: 35 minutes
- 🍴 Best for: Weeknights
- 🥘 Main ingredients: Chicken, almond flour, gluten free flour, ketchup, coconut aminos
- 🔥 Cooking method: Stove top
- 👩🏼🍳 Flavor profile: Tangy and sweet
- ⭐️ Difficulty: Easy
What makes this recipe unique
What makes this one a keeper is the balance of crispy chicken without deep frying and a sauce that's sticky and tangy instead of overly sweet. It comes together in one skillet in under 35 minutes, so it's an easy win on a night when you want something that tastes like takeout but comes together faster than delivery would even show up.
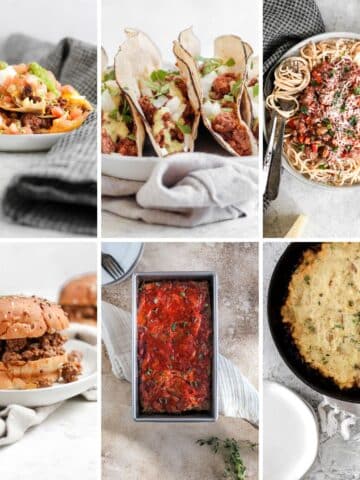
If sweet and sticky sauces are your thing, you'll probably love my Chicken Teriyaki Pineapple Bowl too, it's got that same sweet savory combo in a different format. And if you want to round this out into a full takeout-style spread, my Easy Fried Rice is one of my favorite sides to serve alongside it.
Ingredients

Ingredient notes
Ketchup- I use Primal Kitchen's No Sugar Ketchup.
Gluten free flour- I use Bob's Red Mill Gluten Free 1-1 flour.
Substitutions
Gluten free flour- You can use almond flour instead of gluten free flour. Using almond flour will make this recipe Paleo friendly.
Tapioca flour- If you don't have tapioca flour, you can use arrowroot flour or corn starch.
Coconut aminos- Gluten free soy sauce or tamari works perfectly if you don't have coconut aminos.
Coconut sugar- You can use white sugar or brown sugar. I would opt for brown sugar over white sugar, but either will work.
White vinegar- I prefer white vinegar over apple cider vinegar, but you can use apple cider vinegar instead.
Can I bake or air fry the chicken instead of pan frying?
Yes! For baking, spread the coated chicken on a parchment-lined sheet, spray lightly with oil, and bake at 425 for 18 to 22 minutes. To air fry, cook at 380 for 10 to 12 minutes, flipping halfway through.
Can I use chicken thighs instead of chicken breast?
Yes, boneless skinless chicken thighs work great here and tend to stay extra juicy. The cook time stays about the same, just check that they hit 165°F internal temp.
Why is my sauce too thin or too thick?
If it's thinner than you would like, let it simmer a couple of extra minutes before adding the chicken back in. If it's too thick, stir in a splash of water or broth until it loosens up to the consistency you want.
Step by Step

- In a medium bowl, whisk together the eggs. Cut the chicken into 1 inch pieces and add them to the bowl with the eggs.
- To a large mixing bowl, add the gluten free flour and the tapioca flour and whisk together.
- Using a slotted spoon or tongs, carefully add the egg coated chicken to the mixing bowl with the flour. Be sure to shake off any excess egg and mix the chicken until it's fully coated in the flour.
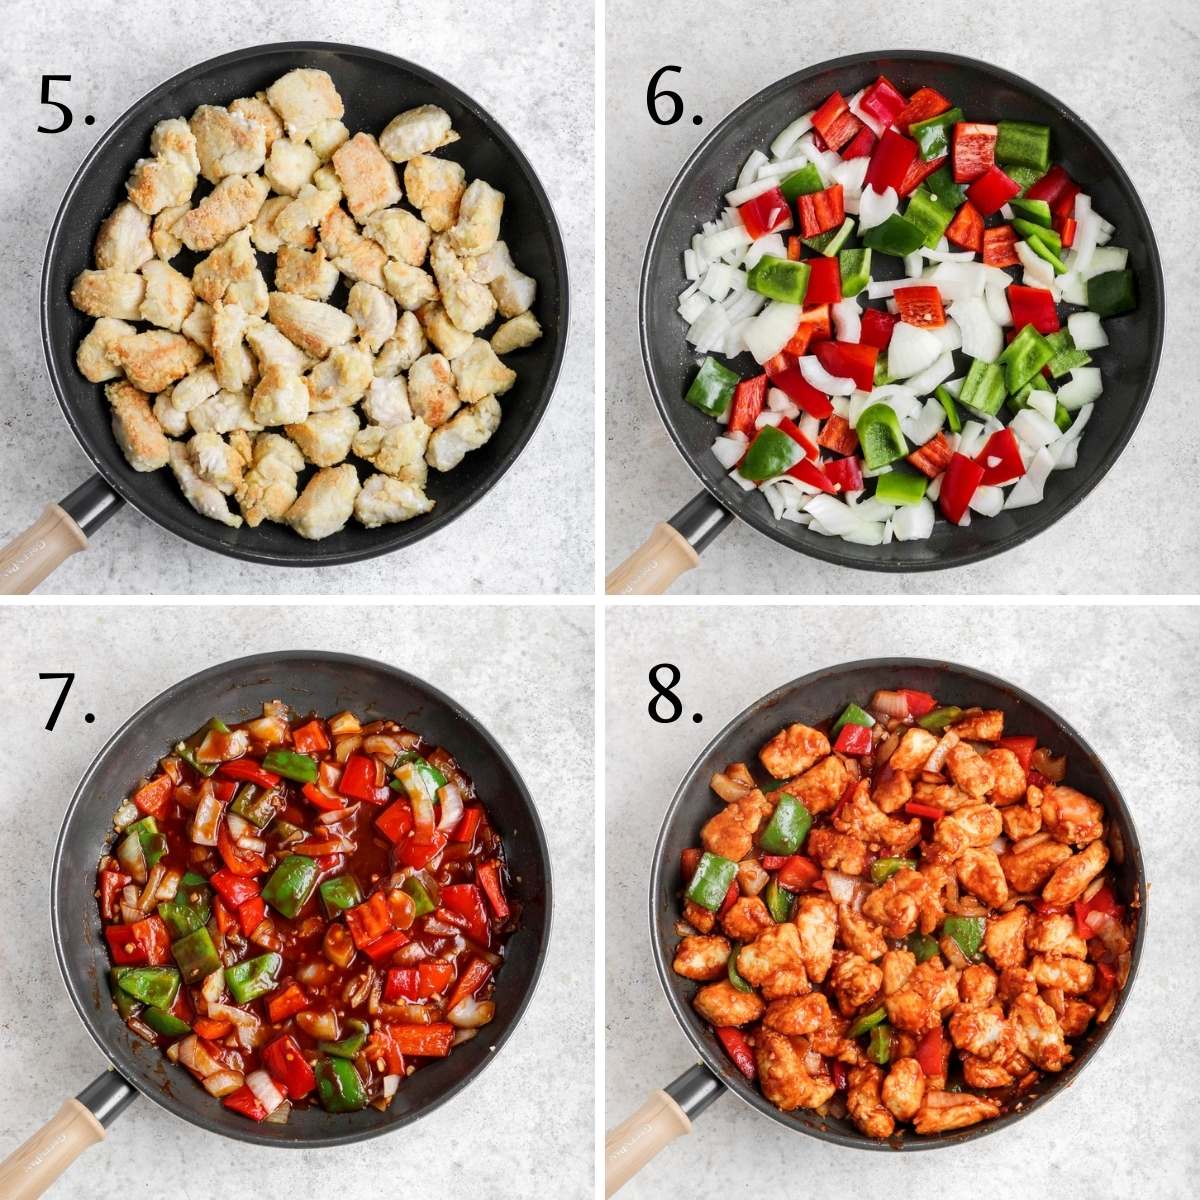
- To a large skillet, add avocado oil and heat to medium heat. In a single layer, add the chicken to the heated pan and cook for 5-6 minutes per side or until crispy and golden brown.
- Once the chicken is cooked and golden brown, remove it from the skillet and set it aside.
- In the same pan you cooked the chicken, add the onions, red bell peppers, and green bell peppers. Sauté them for about 5 minutes or until the onions just start to soften. Then add the garlic and sauté for 60 seconds.
- In a small bowl, whisk together all the sauce ingredients. Add the sauce to the bell peppers and onions and cook on medium low heat for 2 minutes or until the sauce has thickened up some.
- Add the cooked chicken pieces back into the skillet and gently stir to coat the chicken in the sauce. Let it cook on low for 5 minutes. Serve with a sprinkle of sesame seeds, green onions, and a side of rice.
Kaleena's Tips
- Pat the chicken dry. This helps the coating stick better so the chicken crisps instead of steaming.
- Don't overcrowd the skillet. Give the chicken space so it can actually get golden and crunchy on the edges.
- Thicken the sauce to your liking. If you want it thicker, simmer it a little longer. If you want it looser, add a splash of water or broth.
- Want a spicy version? Add a teaspoon of chili paste or sriracha right into the sauce.
Storing, Reheating, Meal Prep
Storing: Store in an airtight container for up to 5 days. The sauce thickens as it chills, which makes the flavors even better.
Reheating: Warm leftovers in the microwave until heated through, or reheat in a skillet over medium heat for 5 to 7 minutes to help the coating crisp back up.
Meal Prep: This recipe is one of my favorite meal prep lunches because it reheats so well. I divide the chicken and veggies into containers with rice or cauliflower rice so we can grab a quick and wholesome lunch during the week without thinking twice.
If you make this recipe, I'd love to hear what you think! Leave a star rating or drop a comment below. Your feedback means so much to me! And if you snap a photo, tag me on Instagram at @kaleenas.kitchen so I can see your version!
Recipe
Crispy Gluten Free Sweet and Sour Chicken
EQUIPMENT NEEDED
- large skillet
Ingredients
- 1.5 pounds chicken breast
- 2 eggs
- ½ cup gluten free flour *I use Bob's Red Mill Gluten Free 1-1 Flour
- ¼ cup tapioca flour
- 2 tablespoons avocado oil
- 1 red bell pepper (chopped)
- 1 green bell pepper (chopped)
- 1 small onion (chopped)
- 2 large garlic cloves (minced)
- Pineapple (optional) *1 cup of pineapple chunks (drained)
For the sauce
- ½ cup ketchup *I use Primal Kitchen's No Sugar Ketchup
- 2 tablespoons coconut aminos
- 2 tablespoons coconut sugar
- 1 tablespoon white vinegar
Instructions
- Cut the chicken into 1 inch chunks.
- To a large mixing bowl, add the gluten free flour and the tapioca flour and whisk together.
- Using a slotted spoon or tongs, carefully add the egg coated chicken to the mixing bowl with the flour. Be sure to shake off any excess egg and mix the chicken until it's fully coated in the flour.
- To a large skillet add the avocado oil and heat to medium heat. In a single layer, add the chicken to the heated pan and cook for 5-6 minutes a side or until golden brown and crispy.
- While the chicken is cooking, chop the red bell pepper, green bell pepper, and onion. Also, mince the garlic.
- Once the chicken is cooked and golden brown, remove it from the skillet and set aside.
- To the same pan you cooked the chicken, add more oil if needed, then add the onions, red bell peppers, and green bell peppers. Sauté them for about 5 minutes or until the onions just start to soften. Then add the garlic and saute for 60 seconds. If you're adding pineapple then add it with the garlic.
- In a small bowl, whisk together the ketchup, the coconut aminos, the coconut sugar, and the vinegar. To the bell peppers and onions, add the sauce and cook on medium low heat for 2 minutes or until the sauce has slightly thickened.
- Add the cooked chicken pieces back into the skillet and gently stir to coat the chicken in the sauce. Let cook on low heat for 5 minutes.
- Serve with a sprinkle of sesame seeds, green onions, and a side of rice.
Notes
- Pat the chicken dry. This helps the coating stick better so the chicken crisps instead of steaming.
- Don't overcrowd the skillet. Give the chicken space so it can actually get golden and crunchy on the edges.
- Thicken the sauce to your liking. If you want it thicker, simmer it a little longer. If you want it looser, add a splash of water or broth.
- Want a spicy version? Add a teaspoon of chili paste or sriracha right into the sauce.
Nutrition
*nutrition information is an approximate
Share this recipe on Facebook
Hi, I'm Kaleena!
Here you'll find wholesome comfort food made with real ingredients and big flavor. I share easy, approachable recipes designed for everyday life, from 30-minute dinners and simple side dishes to cozy soups and crowd-pleasing favorites.
Many of my recipes are naturally gluten free or easily adapted with simple swaps, but the focus is always on real food that tastes amazing and feels doable. Whether you're cooking for a busy weeknight or a relaxed weekend at home, my goal is to help you feel confident in the kitchen and enjoy cooking meals you're excited to make.

Kate says
We bought pineapple and have no idea how much to add
Kaleena Martinez says
Hi Kate! I'd go with about 1 to 1½ cups of pineapple chunks, drained if using canned. I'll get the recipe updated with an amount now, thanks for pointing that out!